
How I Archive My Records
First, I would like to point out that this is not a definitive "How to" article. This is a glimpse into the steps I take, so that you may learn a thing or two. Some steps will be explained in detail, other steps can be found in more detail elsewhere. In 2010 I bought my first Mac along with Traktor Pro Scratch and Logic Pro 9. I'll be using this software, but I'll also list other software that may be used. If you are backing up your record collection digitally, then you may enjoy reading this. Feel free to offer any of your own tips in the comments section.
The Recording Process
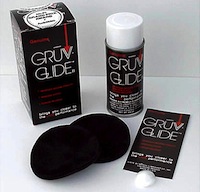
The first step in the recording process is to clean your records. I suggest using the industry standard Gruv Glide. Instructions can be found on the bottle.
I use Traktor's Audio 8 interface to connect my turntables to my computer, and I use Traktor for the recording process. Under Audio Setup I choose my device and I set Sample Rate to 96000 Hz. I used to use CD quality 44.1k, but it seemed like my records sounded better when I used 96k and reduced the sample rate to CD quality later. It could have been my imagination.

At first, I stuck to pure WAV format. Why bother spending so much time recording your tunes if you are going to ruin them with a lossy format such as MP3? I avoided keeping the files at 96k because of how large they were, but I later realized that a 96k FLAC file is about the same size as a 44.1k WAV file. I now record at 96k and convert to FLAC. I thought about converting my past recordings to FLAC, but the Traktor tags are off a bit and it would be too much work to find and retag them all over again.
With the Audio 8 DJ interface, you have to choose between vinyl input or CD. MAKE SURE IT IS SET TO VINYL. Vinyl mode will amplify the signal, while CD mode will not. I once spent 3 hours recording records, and couldn't figure out why my signal was so low. I figured I could raise the volume later, but that didn't work. All 3 hours of work was ruined. Turns out I had spun out recently and used CD decks instead of vinyl, so it was still set to CD mode. I won't make that mistake again. I know the newer interfaces have automatic detection, so I'm not sure if there is a way to manually set the mode anymore.
The next step is to choose your source channel. Select Recording, choose Extern under Source, and choose an input channel.

On the main screen you will see a tape cassette in the right hand corner. Clicking this will bring up the Audio Recorder. Play your record and raise the gain a bit. All records are recorded at different levels, so I only do a slight boost (about +1.6 db). Do not record so loud that clipping occurs. You can always raise the volume later.

Be sure to record a few seconds of silence before and after the record. You will need this "silence" for cleaning up the audio signal later. Recorded files can be found by default in the Music folder under Traktor/Recordings. I always change the name after each recording while the record is still nearby. My preferred format is Artist - Track Name (Mix).
The Cleaning and Remastering Process
I used to use Nero for burning my DJ mixes, and I noticed it had all kinds of options for cleaning up audio files. When I started using my Mac, I had to find an alternative since I no longer had Nero anymore. Some people love Audacity, but I was not impressed. I also read great things about Sound Soap by Bias, but it was too expensive for me. I've since read that Bias is no longer in business. I eventually discovered that Soundtrack Pro which came with Logic Pro 9 has some great features for cleaning up audio.
Soundtrack Pro starts in Multitrack mode by default. The easiest way to load a track is to drag-and-drop it into track 1. Double-clicking the sound file will take you into Audio Editing mode. I noticed that all my recordings favor the right channel, and the bass seems weak compared to the original. I correct these issues first.
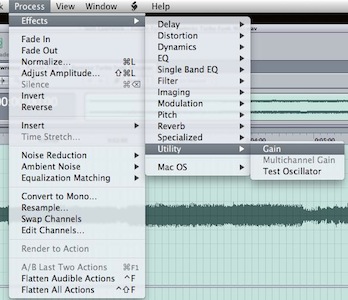
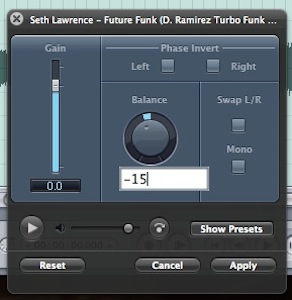
To adjust the panning, I choose Process, Effects, Utility, and Gain. For my particular needs, I set the Balance to negative 15.
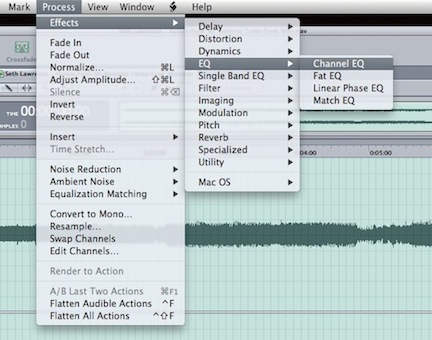
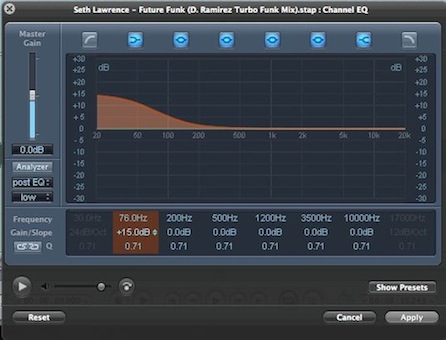
To adjust the bass, select Process, Effects, EQ, and Channel EQ. I give the bass a +15 dB boost. That may seem a bit much, but it sounds awesome. Remember, all your records are mastered differently, so you may have to experiment with how much bass boost you apply.
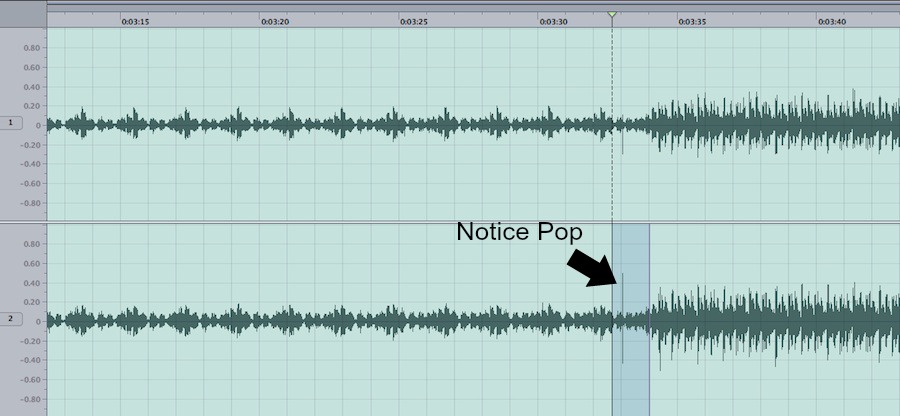
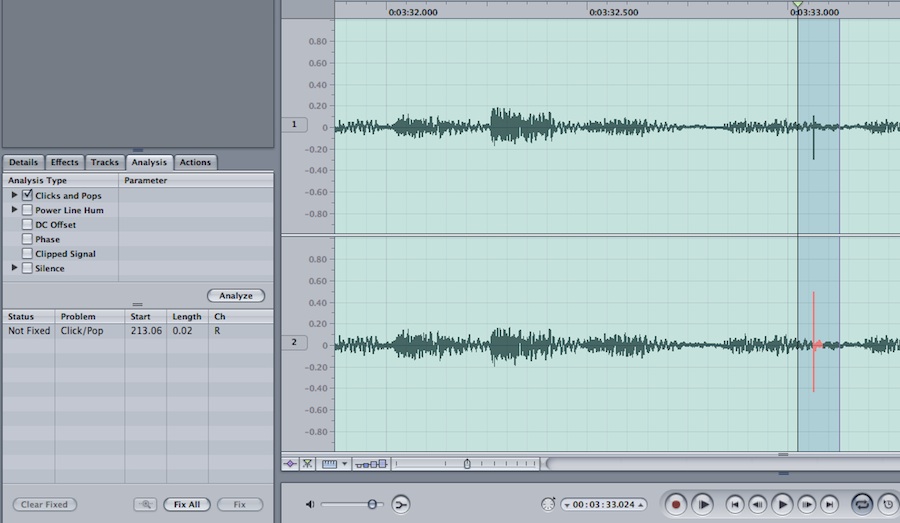
Listen and look for any pops in your recordings. Pops can sometimes be obvious to spot visually (see pic). The best way to remove pops is to zoom in, highlight the pop, and surgically remove them. To the left of the audio file, you should see a box with an Analysis tab. With the pop selected, choose Clicks and Pops and click Analyze. The pop should turn reddish. Select Fix All to reduce the pop. The sound may not disappear, but it should be less noticeable.
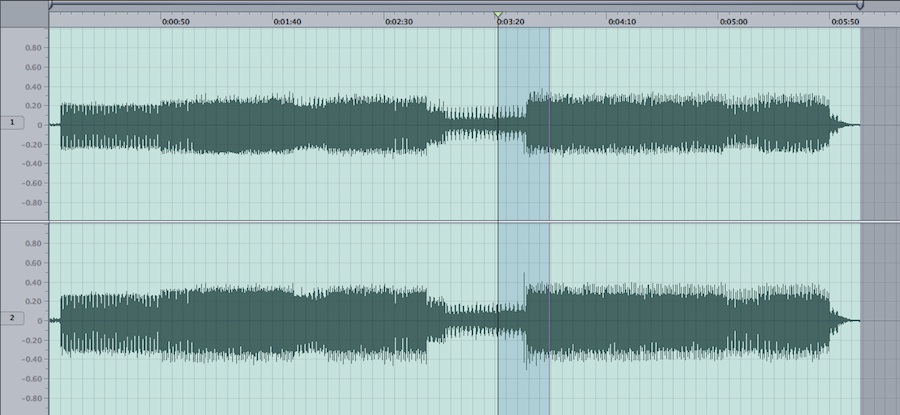
With these dynamics taken care of first, you can now normalize your audio. Normalize will maximize the volume before clipping occurs. This needs to be done after you adjust panning, the bass, and clipping. Under Process, select Normalize. The default setting should be fine.
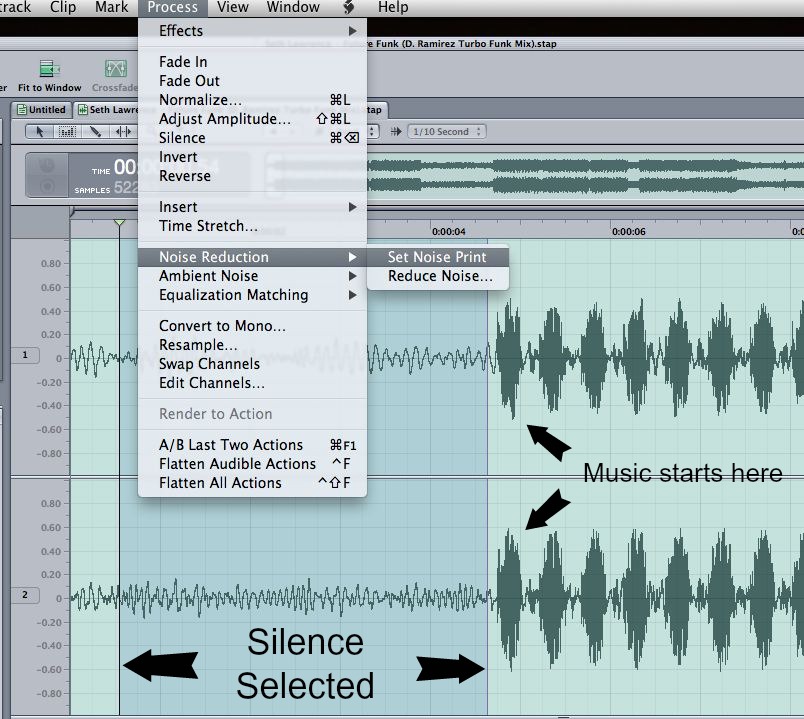
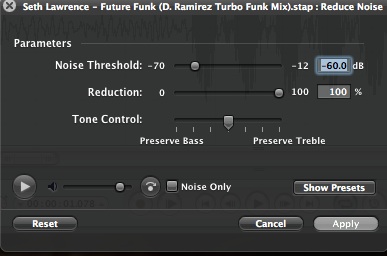
It is now time to clean up the signal and remove unwanted noise, such as the sound of the needle scraping against the record. This can be done before or after normalization, but I do it after so I can hear the "silence" better. First, select the silence you recorded from the beginning or ending of the record. I zoom in really close and get the silence in the beginning (see pic). Then choose Process, Noise Reduction, and Set Noise Print. Then select Reduce Noise. Play the track and slowly reduce the Noise Threshold. I like to select the Noise Only option. When I start to hear the tune's music, I know I went too far. In most cases, negative 45 dB to negative 40 dB should work fine.
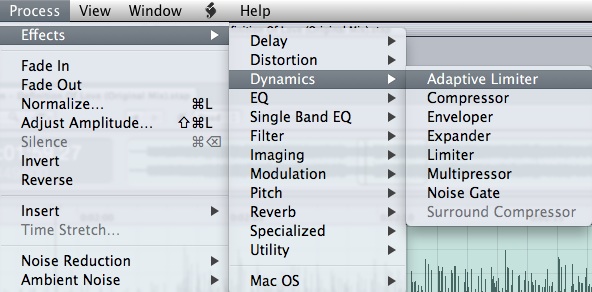
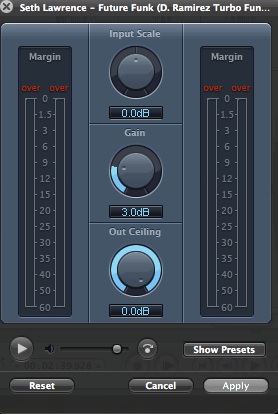
I used to stop here, but for some reason the Auto Gain on Traktor used to boost my audio a lot compared to commercially bought tunes and CDs I ripped. The normalization process will maximize the volume, but it will stop at the briefest peak in audio. I now use the Adaptive Limiter to squeeze a few more decibels out of the track. Select Process, Dynamics, and Adaptive Limiter. Play the track at its loudest part, and pay close attention to the limiter. On the left is the original sound, and on the right is the output sound. I check the average margin of the original, and use that value for the gain. On average I can add 1 to 3 decibels, but no more.
You can now close out the Editing view and return to the Multitrack view. Remove the silence by grabbing the bottom left hand corner of the file and sliding to where the sound starts. It may help to zoom in a little. I used to remove all silence in case I wanted to burn it to CD, but I now leave a little silence in the beginning since it works better with Traktor. Plus, converting to FLAC seems to crop some of the beginning off, so having silence prevents the music from being chopped off. Go to the end of the file and remove the silence the same way. I wear headphones so I can hear when the sound really ends, then I hit the spacebar to stop the playback. I then grab the bottom right corner and drag it to where the playback marker is stopped.
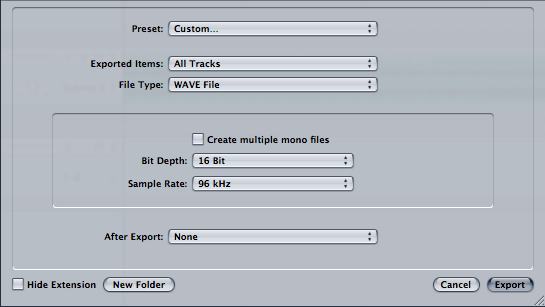
It is now time to finally export the file. Choose File then Export. Be sure to set Exported Items to All Tracks and Sample Rate to 96 kHz. I always add the letter f (for fixed) after the file name. I tried saving over the old file, but that caused issues. Plus, I always test the fixed version before deleting the original. If it all goes well, I delete the original and remove the letter f.
Test Tempo and Convert Process
I keep all my vinyl recordings in a folder called My Vinyl. I place the fixed files into the My Vinyl folder and import them into Traktor. I then select the newly added files and choose Async to analyse the files. I make sure all the files keep a perfect tempo. If the tempo is perfect, I convert them to FLAC. If the tempo is not perfect, I load them into Logic and use Flex Time to fix tempo fluctuations.
There are many tutorials on YouTube on how to fix tempos with Flex Time, so I won't go into detail here. If you don't use Logic, there are many other DAWs that offer tempo stretching abilities. One tip I will give is to use the BPM from Traktor as a starting point. If you use Logic, make sure you turn off the metronome before bouncing the file, otherwise it will show up in the exported file. I can't tell you how many times I've done that. Which is also why you should NEVER delete original files until you test the new ones.
Before I convert to FLAC, I go to discogs.com to look for album art. I used to scan my own album art when I ripped my CD collection, but the vinyl covers were too big for my scanner. If I can't find the album art on Discogs, I try Google images. If those don't work, I don't worry about it too much. Save the album art to the desktop.
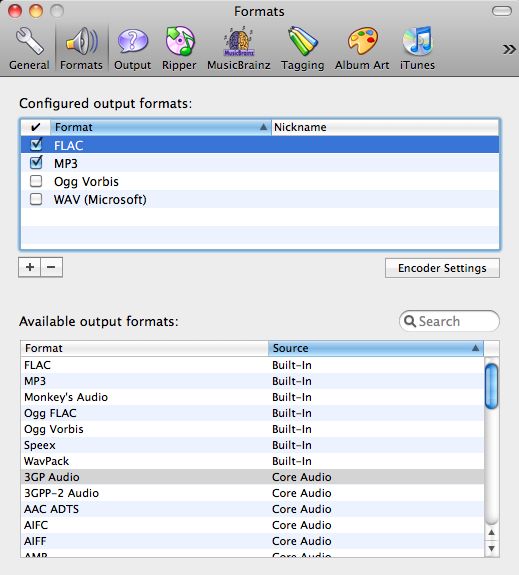
As a Mac user, I use Max to convert to FLAC. For PC users, I would suggest CDex or MediaMonkey. If you use Max, choose Preferences under Max and then select the Formats tab. Max has an issue with the Formats tab, so it may crash. Just try again. I find it helps to click around on the other tabs before clicking the Formats tab. You can output to multiple formats with Max. This is helpful if you want FLAC versions for DJing and MP3 versions for iTunes. After you have set up your formats, select File then Convert Files. This will open the File Conversion window. Click the Metadata tab to add Artist, Title, Genre, and perhaps Album info. Click the Album Art tab and drag the album art from the desktop into the opened window. Then click convert.
MediaMonkey allows you to add multiple album art such as front cover and back cover. I love this feature, but for some reason Traktor displays the back cover art. It is annoying, but you can always add album art in Traktor as well. I choose to add album art first, since album art added with Traktor is kept in the Traktor tag not the file.
Max - For MacCDex - For PC
MediaMonkey - For PC
I import the FLAC files in Traktor, and delete the WAV versions from the Traktor library. I then delete the original files from my computer once everything checks out. ALWAYS test files before deleting the original.
Playback Methods
Sometimes I want to play back my FLAC files without having to load up Traktor. I used to use MediaMonkey, but unfortunately MediaMonkey is PC only. Playing FLAC on a Mac is a little more difficult. One option is to use Fluke. Fluke allows FLAC files to be played in iTunes. I ripped all my CDs to FLAC, so this was a great option. Unfortunately, Fluke only works with 44.1k FLAC, so my 96k records wouldn't work. To play back those files, I use the VLC player.
FlukeVLC Player
So there you have it. Those are the steps I take to make my records sound as best as possible. If you have any tips you wish to share feel free to add them in the comments section.
Josiah Cochran
December 19th, 2012
Click here to return to the top